18 Jun 2024
Wouldn't it be cool if we had a raspberry pi powered device that have a display that read the internal temperature of the room and the actual temperature connected some probe but also it would have some in generalise display of the days weather showing the precipitation wind in temperature of each hour am I don't know what kind of display that would need maybe some sort of LCD display or a segment display or you know the dot matrix display
-- a voice note to myself when fleshing out this project
Here's a progress report on ESPweather, a working title for a personal weather station clock. It started off as an excuse to start a hobby electronics project and has become a delightful addition to my workspace.
Good news! You can download and play with this yourself. ESPweather
Segment displays
I've always been fascinated with 7-segment displays seen in microwaves, old school alarm clocks, car radios - they're ubiquitous. They represent an almost perfect minimalist display - No less than 7 segments can comfortably display a standard set of 26 letters and 10 digits. There are some interesting attempts, but 7 segments produce a perfect balance of consistency readability, and geometric simplicity.
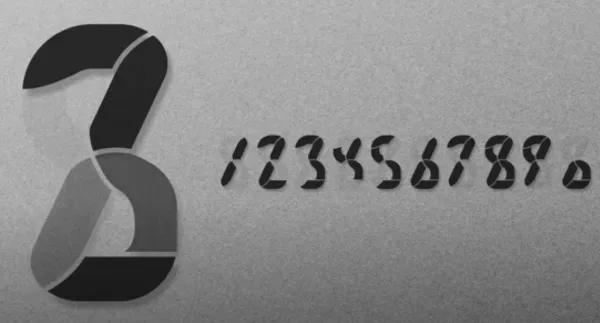
Posy explores interesting segmented display concepts - some of which are intriguing - but often, have to make compromises.
I was looking a simple, peaceful segmented clock display that I could mount on top of my screen, which could give me the current weather conditions. I couldn't find anything that specifically achieved what I was looking for, so I decided to make my own.
The setup
The core of this project uses a TM1637 7-segment display, which is a common chip used for 4-digit 7-segment displays. This uses a simple 4 pin setup and is widely documented, with many ready-to-go libraries available for interfacing. There are 6-digit variants, and I am already on the hunt for a 20-digit variety, but the available support for this component reduced hardware-interfacing complications.
I initially used a Raspberry Pi and Python to interface with the chip, but when I realised this was probably overkill and meant it couldn't be compact, I moved to an ESP32. Using an ESP32 was easier than an Arduino Nano, because of the built in WiFi and touch pin capability, which meant I could use bare pins as buttons before I considered actual buttons. I had access to many libraries for basic clock functionality, handling APIs, and also interface with the 7-segment display.
To get weather data, I used OpenWeatherMap API, which has a very generous free allowance and easy-to-read documentation. All I needed to get from this initially was temperature for my local area, but it turns out a whole lot of extra parameters were available, which could come in useful if I wanted to develop the tool.
Exploring concepts
Getting a clock and temperature display was easy work (after some help below)
Initially, I had only intended on a simple clock display which showed the temperature when a button was pressed. However, during my research, I saw some magnificent examples of segmented displays being employed in creative ways.
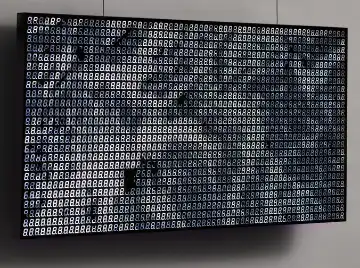
Sea of Segments by Will Gallia takes this concept to the extreme, with 12,288 segments coming together to create a truly incredible visual.
These took the approach of treating these arrays of segments as pixels. A question had struck me; how far can this be stripped back and still display a visual interpretation of something like weather?
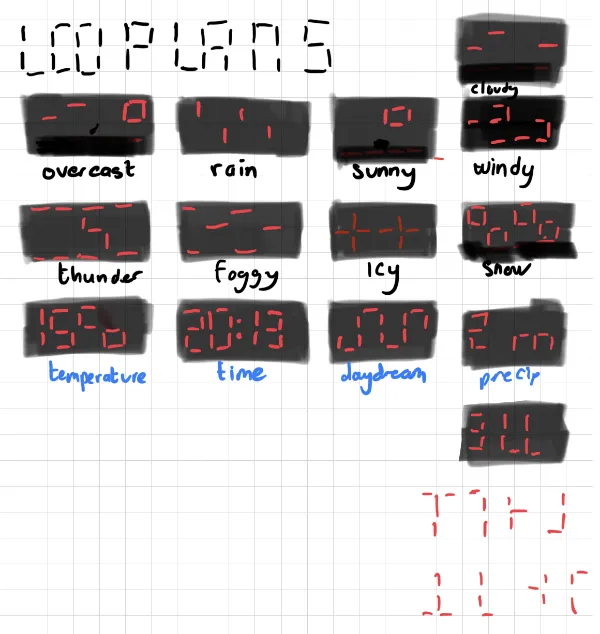
Using the concept of lines as clouds and a single circle as the sun, I was able to create some initial visuals of the weather conditions reported by OpenWeatherMap.
I mapped these using the TM1637's binary output to control each individual cell. Counting cells from the reference diagram became a little cumbersome, and ended up in odd outputs where I'd make a mistake.
I wanted to be able to code a visual to binary editor, but I suck at coding - so playing on my strengths, I developed a quick configurable prototype in Figma that would allow me to visually create the graphic I desired, and then see what binary output I required - big time saver.
When displayed statically, these were a little disappointing. I tried to distinguish these graphics by toggling the brightness to indicate activity, but I began to realise that these graphics needed some context to better communicate each weather state. This is where I began playing with animation.
Using the configurable I had set up in Figma, I was able to create prototypes to visualise and tweak both animation frames and speeds.
...And the results turned out great!
Code
So, I'm not what you could describe as either an electronics enthusiast or an experienced developer. I know how to do some very basic wiring and I understand fundamental coding logic, so building something even as simple as this was a challenge for me.
Where electronics are concerned, maker communities are very generous with sharing their knowledge - as well as an endless number of guides like this one to set up the display, there were also libraries that offer extended functionality, like bremme's TM1637 library, which saved me hours, perhaps even weeks of frustration.
I also used this guide by Random Nerd Tutorials to understand the basics of how to convert the OpenWeatherMap response to a data structure that could be interpreted by the TM1637, which was my only major hurdle in the basic implementation.
When it came to adding a button to display weather data on command, things got screwy.
It took an embarrassingly long time for me to figure out how to interrupt the clock display when a button was pressed. I didn't fully understand the concept of multi-threaded processes, and went down all the wrong rabbit holes with interrupts, mainly resulting in me crashing my program.
As a hobbyist, I wanted the focus to be on my ideas, not necessarily take a weeks-long refresher course in C just to be able to work out a button press.
Here's where an expected friend came in the form of ChatGPT.
Now, I have my own reservations about the rampant hype and misuse of AI, the problematic big tech governance, and the ramifications on energy consumption. However, I am hopeful of a future where we can tap into language models as a way to empower people to build their own personal and digital software and open-minded about the potential for good.
When it came to converting my program from Python to Arduino C, this code copilot was remarkably helpful at reinterpreting functions, not only with examples but context as to why these changes were made.
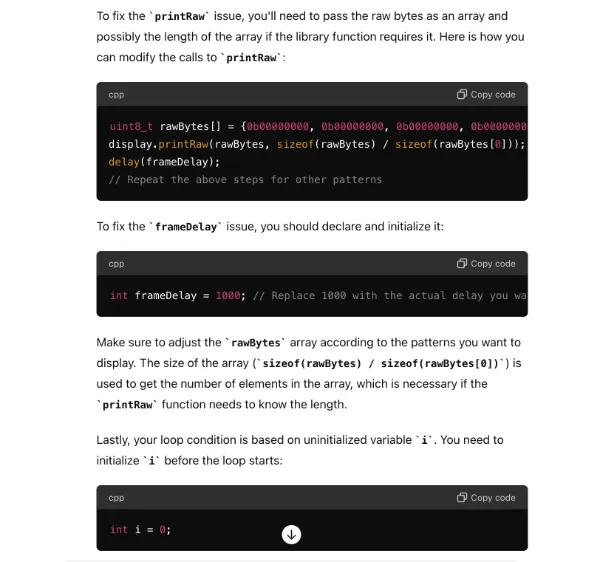
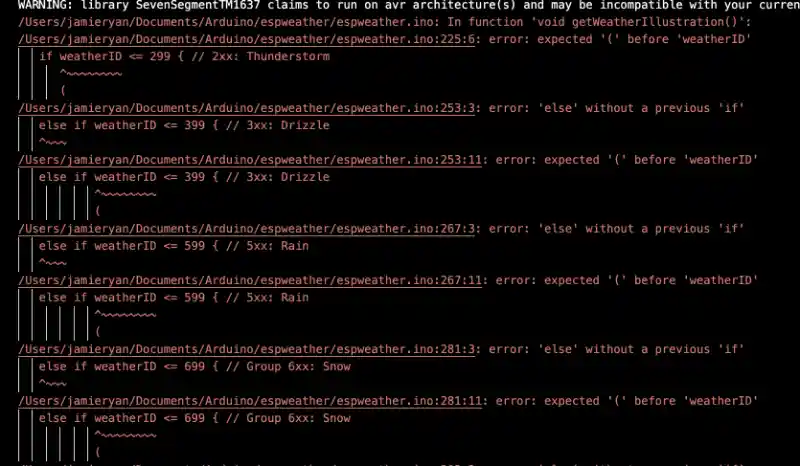
When I had issues compiling my code, I managed to find solutions - not always the right ones, but with my foundational knowledge and a bit of negotiation, received enough information to unblock my work. I got a few 'hallucinations' in the form of non-existent libraries and code patterns, but as long as I steered the model back on rails, I got the answers I needed to get results.
I should also point out that the kind of project I'm working on could probably be assembled with bells and whistles in an afternoon by any competent developer, but I like the idea of a hobby project being made more accessible by tools like this.
Casing
Fortunately, I own a 3D printer, which made creating a case easy. I was inspired by a case retroqwe had created which used a single layer that the display shines through, a really nice touch. I experimented with this approach and found that my matte PLA fashioned the best results. With some tweaking of my model in Fusion 360, I was able to get the display flush with the veneer wall. The effect is fantastic - when it's not in use, there is no visual clutter.
Closing thoughts
This project has been personally empowering - as someone who is traditionally a little afraid of electronics, a device such as an ESP32 has abstracted some of the frustrating parts of wiring components and has sparked curiosity to try more things and tinker with more components in the future.
Full disclosure - I didn't start coding from scratch with this project. I had previously completed edX's CS50X course which mainly involved using C. However, I do believe that nothing I've coded is particularly impressive or groundbreaking; in fact, it's probably terribly coded from an optimisation point of view. I think the key thing to be able to understand to code well is to understand the concept of modularity (each small function builds up to something greater) and logic (describe what you want to do in English, draw it out, then convert that to your language's operators). Even if you have no idea what you're doing, there's help in the form of artificial co-pilots and communities that want you to succeed at whatever you do.
Recently, I came across this article on 'home-cooked-software', which poignantly articulates my motivations behind building this device. Nothing that this clock does is something I can't access from my phone or my desktop - but there's something peaceful and joyous about seeing my little weather clock booting up, and seeing a cute little weather animation scrolling across the little segmented display that yearned to be more than a microwave timer.
What's Next?
Expect a followup article with further developments of this project. I'd like to see how far I can take the concept before expanding the display.
- A fix for Daylight Savings - NTP time doesn't account for this.
- An additional button - this unlocks a lot of new capabilities, including a potential mode selector, back/forward, dedicated function buttons.
- Pomodoro timer - the focused nature of this device is perfect for it.
- Some way of displaying upcoming tasks or meetings.
- More animations and fun! I had so much fun with these initial animations, and there's so much more possibility.
- General sizing down of the case and wiring - the pins on the TM1637 jut out to the side, rather than behind, so I may have to experiment with soldering to replace the jumper wires with something more permanent.
References
This project wouldn't have been possible without bremme's TM1637 library. Being able to output binary sequences was key to developing the animations.
This page (with gzip compression) weighs just under 1MB, despite the numerous videos and images displayed, thanks to tools like Handbrake and Affinity Photo. My main inspiration for these choices is Low-Tech Magazine. I think we could all do a better job at optimising our content. As always, I aim to strike the balance of presenting media and staying light on page weight.
 Jamie Ryan